
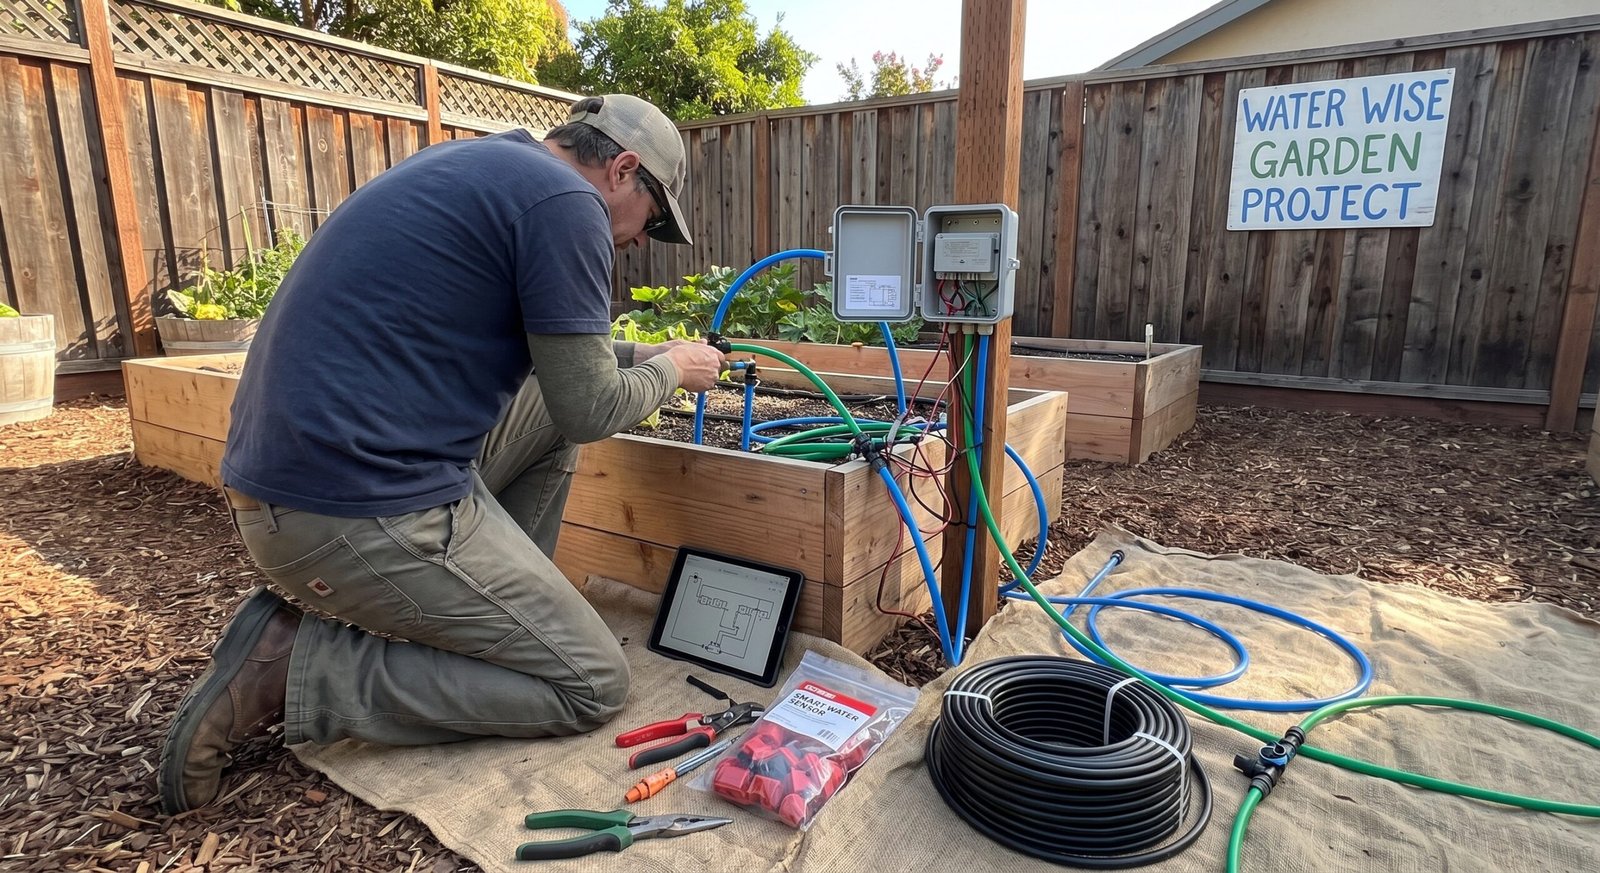
Most home gardens are quietly hemorrhaging water. Traditional sprinkler timers run on fixed schedules regardless of rainfall, soil saturation, or temperature a wasteful approach that, according to the EPA’s WaterSense program, can lead to significant water waste through inefficient irrigation.
Building a DIY smart irrigation system changes that equation entirely. Rather than guessing when your garden needs water, you’ll create a system that knows drawing on real sensor data to make intelligent, automated decisions. It’s a smarter way to garden, and it’s more achievable than most people expect.
Here’s what you’ll learn by following this guide:
- Understand the core components of a smart irrigation control system and how they work together.
- Select the right hardware soil moisture sensors, microcontrollers, and solenoid valves for your specific garden layout.
- Wire and configure your sensors so they deliver accurate, real-time soil readings.
- Program automated logic that triggers watering only when plants genuinely need it.
- Connect your system remotely so you can monitor and adjust from your phone.
- Test, refine, and expand your setup as your garden grows.
If you’ve already explored automating other areas of your home, you’ll find many of the same principles apply here. Building a smart irrigation system doesn’t require an engineering degree just a methodical approach and the right roadmap. The next step is understanding exactly what makes these systems so effective.
What Is a DIY Smart Irrigation System?

Before diving into the build process, it helps to understand exactly what you’re working toward. A DIY smart irrigation system replaces guesswork and fixed schedules with real-time data automatically deciding when, where, and how long to water based on actual conditions in your garden.
Here’s how the core process works, step by step:
- Sense the environment. Soil moisture sensors, weather modules, or both feed live data into a central controller. Instead of watering on a timer, the system reads whether the ground actually needs water right now.
- Process the data. A microcontroller, such as a Raspberry Pi or an Arduino, compares incoming sensor readings against your preset thresholds. If soil moisture drops below a defined level, the controller flags an irrigation cycle as needed.
- Trigger the valves. The controller sends a signal to the solenoid valves in each irrigation zone, opening and closing the water flow with precise timing rather than brute-force scheduling.
- Log and adjust. These systems record each watering event. Over time, you can review patterns and fine-tune thresholds a level of feedback that fixed-schedule sprinklers simply can’t offer.
- Connect remotely. Most DIY builds incorporate Wi-Fi or Bluetooth modules, letting you monitor soil conditions and override schedules from your phone. Just as smart home climate controls put energy management in your pocket, a connected irrigation system puts water management there too.
- Scale as needed. Add sensors, expand zones, or integrate rain gauges as your garden grows — without replacing the entire system.
Why are more gardeners making the switch?

Outdoor water use accounts for a significant share of residential consumption, and smart irrigation technology can reduce that waste considerably. Systems that use sensors to monitor soil moisture have been proven to prevent both overwatering and underwatering two of the most common causes of poor plant health.
DIY systems versus commercial systems comes down to three factors: cost, customization, and expandability. Pre-built smart controllers typically run $150–$300 and lock you into proprietary apps and fixed zone counts.
A typical DIY build often costs under $100 and gives you full control over every variable. On the other hand, commercial systems offer polished interfaces and professional support a fair tradeoff if hands-on building isn’t your preference.
Once you understand what the system does and why it outperforms traditional watering, the advantages of building your own become even clearer.
Benefits of Building Your Own Smart Irrigation System

Building a DIY water wise garden irrigation setup delivers measurable advantages that go well beyond simply cutting your water bill. Here’s what you’ll gain by switching from a traditional fixed-schedule sprinkler system to a sensor-driven smart irrigation control system.
- Save significant water. Smart irrigation systems that use soil moisture sensors and weather data can reduce outdoor water use by up to 50%, according to the EPA’s WaterSense program. That translates directly to lower utility bills each month.
- Prevent overwatering and underwatering. Real-time soil moisture feedback stops both extremes. Plants get water only when they actually need it, not on a rigid calendar that ignores last night’s rain.
- Improve plant growth and root health. Consistent, precise hydration encourages deeper root development and stronger plants overall. In practice, gardens running on smart irrigation systems show fewer disease issues caused by soggy soil.
- Keep your garden running while you’re away. Automated scheduling means your plants stay healthy during vacations or busy weeks without relying on a neighbor to water them.
- Monitor and adjust remotely via smartphone. A Wi-Fi-connected controller lets you check soil conditions, pause a cycle if rain is forecast, or tweak watering durations from anywhere.
- Upgrade easily over time. A modular DIY build lets you add zones, swap sensors, or integrate new automation features without replacing the entire system.
Planning Your DIY Smart Irrigation System

Good planning is the foundation of any successful smart irrigation control system. Before you purchase a single component, a few upfront decisions will save you hours of troubleshooting and rewiring later. Here’s how to map out your build from the ground up.
- Determine your garden’s watering needs. Identify which plants are thirsty and which are drought-tolerant. Group them by water requirements. This directly shapes how many zones your system needs and how often each zone should run. Vegetables typically need more frequent watering than ornamental shrubs, so treat them separately.
- Measure your garden zones. Walk the yard and sketch a rough layout. Note the square footage of each zone, the distance from your water source, and any slopes or shaded areas that affect evaporation. Accurate measurements help you size tubing, calculate flow rates, and avoid under-watering corners of the garden.
- Choose between a water pump or a solenoid valve. A solenoid valve connects inline with an existing pressurized water line and opens or closes on command — ideal for most residential setups. A water pump draws from a reservoir or rain barrel and suits off-grid or pressure-free installations. Your choice here determines the relay type and power supply you’ll need.
- Select your Wi-Fi-enabled controller. This is where many builders start their arduino smart irrigation system tutorial research. The three most common options are the ESP32 (dual-core, Bluetooth + Wi-Fi, great for complex logic), the NodeMCU ESP8266 (affordable, Wi-Fi only, beginner-friendly), and an Arduino Uno paired with a Wi-Fi module (familiar IDE, modular approach). The ESP32 is generally the strongest all-around pick for a full-featured DIY smart irrigation system.
- Map out your wiring and power plan. Decide whether you’ll run on a USB power adapter, a 12V DC supply, or solar. Sketch a basic wiring diagram showing the controller, relay module, sensors, and valves. This prevents costly mistakes once you’re mid-build.
- Set a realistic budget. A single-zone smart irrigation system can be built for as little as $25–$50 in components, while a multi-zone setup with sensors and a weather API integration may run $80–$150. Knowing your budget ceiling now helps you prioritize features versus cost.
Hardware Components You’ll Need
With your system layout mapped out from the planning stage, it’s time to gather the physical building blocks. Selecting the right components upfront prevents compatibility headaches later and keeps your DIY smart irrigation system running reliably season after season.
Follow these steps to identify and assemble all the core components your smart irrigation control system requires.
- Choose your microcontroller. The ESP32 is the go-to choice for a DIY smart irrigation build it offers built-in Wi-Fi, Bluetooth, dual-core processing, a generous number of GPIO pins, and all for roughly $5–$10. The Arduino Uno is a beginner-friendly alternative, though it lacks native wireless connectivity without an add-on shield.
- Select a soil moisture sensor. Opt for a capacitive sensor over a resistive one whenever possible. Capacitive sensors measure the dielectric constant of soil rather than passing current through it, so they resist corrosion and last significantly longer outdoors. Resistive sensors cost less (often under $2) but degrade within a single growing season in damp soil.
- Add a relay module. A relay module bridges the low-voltage microcontroller signal and the higher-voltage circuit powering your pump or valve. A four-channel relay board gives you room to control multiple zones independently — a worthwhile upgrade even if you’re starting with just one zone.
- Pick your watering device. For raised beds or container gardens, a small submersible pump ($8–$20) works well. For in-ground systems tied to a hose bib or existing supply line, a solenoid valve (typically 12 V DC or 24 V AC) is the cleaner solution. Match the valve’s voltage rating to your power supply before purchasing.
- Plan your power supply. Most ESP32 builds run on a 5 V micro-USB supply for the board, paired with a separate 12 V DC adapter for the relay and valve. A single multi-rail power supply simplifies wiring. For remote garden beds, a small solar panel with a lithium battery pack is a practical off-grid option.
- Gather irrigation plumbing. Assemble drip emitters or micro-sprinkler heads, 1/2-inch poly mainline tubing, 1/4-inch distribution tubing, and barbed fittings appropriate for your layout. A drip irrigation setup reduces water loss to evaporation compared to overhead sprinklers.
Optional smart home accessories, such as a temperature/humidity sensor (DHT22), a Wi-Fi-connected display, or integration with a home automation hub, can add extra intelligence to your system without changing the core hardware stack.
Once you’ve sourced every component, having the right hand tools makes assembly straightforward and that’s exactly what the next section covers.
Tools You’ll Need
Gathering the right tools before you start saves frustrating mid-project trips to the hardware store. Whether you’re building a basic Arduino setup or a more advanced Raspberry Pi smart irrigation system, the same core toolkit applies.
- Grab a screwdriver set, both Phillips and flathead, for securing enclosures, terminal blocks, and mounting brackets.
- Use a wire stripper to cleanly prep sensor and solenoid wires without nicking the copper.
- Set up a breadboard with jumper wires to prototype your circuit before making any permanent connections.
- Keep electrical tape and a multimeter nearby the tape insulates exposed connections, while the multimeter verifies voltage and continuity.
- Reach for a drill when mounting the control enclosure to a wall or fence post.
- Use a PVC cutter for clean, square pipe cuts, and secure all cable runs with zip ties to keep everything tidy and weather-resistant.
With your toolkit assembled, you’re ready to move into the hands-on build phase.
Step-by-Step Guide to Build a DIY Smart Irrigation System
With your hardware sorted and tools laid out, you’re ready to bring everything together into a fully functioning smart irrigation control system. This guide walks you through each stage — from sketching your layout to running your first automated watering cycle — so you finish with a reliable, water-wise setup that responds intelligently to your garden’s actual needs.
- Design your zone layout on paper first. Before touching a single pipe, sketch your garden beds, lawn sections, and container areas. Mark where each drip emitter or sprinkler head will sit, note the distance from your water supply, and identify the best spot for your controller enclosure. A clear layout prevents costly replumbing later and makes cable runs for your DIY soil-moisture-sensor irrigation setup far more logical.
- Install the water supply connection. Shut off the main water line, then tap into your outdoor spigot or existing irrigation line using a backflow preventer and a filter. These two components protect both your plumbing and your solenoid valves from debris and pressure surges. Use Teflon tape on all threaded joints and hand-tighten before adding a quarter-turn with pliers; over-tightening cracks fittings.
- Assemble the plumbing runs. Route your main supply line (typically ¾-inch poly tubing) from the manifold toward each zone. Branch off with ½-inch tubing to reach individual beds, then connect drip emitters, micro-sprinklers, or solenoid valve inlets as needed. Keep tubing secured with ground stakes every 18–24 inches to prevent shifting. Cap all open line ends before pressurizing to spot leaks immediately.
- Wire the electronics in your enclosure. Mount your Arduino (or Raspberry Pi) and relay module inside a weatherproof project box. Connect each solenoid valve’s positive wire to a relay output channel and run a shared ground back to the controller. Wire your 12V power supply to the relay board’s VCC pin, and connect the Arduino’s 5V and GND pins appropriately. Label every wire it saves significant troubleshooting time later. Keep low-voltage signal wires away from high-voltage solenoid lines where possible.
- Install soil moisture sensors at root depth. Push capacitive soil moisture sensor probes 3–4 inches into the ground at root level within each irrigation zone. Route sensor signal and power wires back to your enclosure through conduit or buried sleeving to protect them from UV exposure and lawn equipment. Plug each sensor into a dedicated analog input pin on your Arduino. In practice, spacing sensors evenly across a zone yields a more representative soil reading than clustering them near a single plant.
- Upload your Arduino code and configure thresholds. Connect your Arduino to a laptop via USB and open the Arduino IDE. Load your irrigation sketch, set your moisture threshold values (typically a raw analog reading between 300 and 700, depending on your sensor), and assign the correct digital output pins to each relay channel. Compile and upload. Once uploaded, disconnect the USB cable the controller will run independently from its dedicated power supply.
- Test the entire system end to end. Turn the water supply back on slowly and check every plumbing joint for drips. Manually trigger each relay from within your code’s test routine to confirm each solenoid valve opens and closes correctly. Then simulate a dry soil condition by holding a moisture sensor in open air watch the corresponding valve activate. Finally, bury sensors, restore all covers, and run a full automated cycle to verify timing and flow.
A complete end-to-end test is the most important step in this list. Catching a faulty wire connection or a slow-drip fitting now means your smart irrigation system runs reliably from day one rather than flooding a bed at 2 AM. Once everything checks out mechanically and electrically, the next piece of the puzzle is understanding exactly why the code makes the decisions it does — and that starts with the moisture threshold logic at the heart of your automation.
Sample Smart Irrigation Logic Explained
Once your build is wired up and the code is loaded, understanding why the system behaves the way it does makes troubleshooting far easier. At the core of any DIY smart irrigation controller project is a simple yet powerful concept: moisture threshold logic.
Here’s how the decision-making process works, step by step:
- Read the sensor value. The soil moisture sensor continuously outputs a number typically between 0 and 1023 on an Arduino where lower values indicate wetter soil.
- Compare against your threshold. The code checks whether the reading exceeds your defined dry threshold (for example, above 600 = dry soil).
- Trigger the relay. If soil is too dry, the microcontroller sends a signal to activate the relay, opening the solenoid valve and starting water flow.
- Monitor continuously. The sensor keeps reading at set intervals, so the system never overwaters.
- Close the valve. Once moisture rises above the wet threshold, the relay cuts power and watering stops automatically.
- Log or display the result. Optionally, output readings to a serial monitor or small LCD screen so you can observe patterns over time.
In practice, dialing in your thresholds takes a little experimentation soil type, pot size, and plant variety all affect the ideal numbers. Once calibrated, this logic runs reliably hands-free. Ready to go further? The next section explores adding IoT features so you can monitor and control everything remotely from your smartphone.
How to Create a Smart Irrigation System with IoT Features
Adding IoT connectivity transforms your smart irrigation system from a standalone controller into a remotely managed, data-driven tool you can monitor and adjust from anywhere. Here’s how to connect your ESP32 to the cloud and unlock smartphone scheduling for your DIY smart irrigation system.
- Connect your ESP32 to Wi-Fi by adding your network credentials directly to the firmware. In your Arduino sketch, include `WiFi.begin(“YourSSID”, “YourPassword”)` inside the `setup()` function and add a loop that waits for `WiFi.status() == WL_CONNECTED` before proceeding. Confirm the connection by printing the assigned IP address to the Serial Monitor this confirms your smart irrigation control system is online.
- Install and configure the Blynk app on your smartphone. Create a free Blynk account, start a new project, and copy your Auth Token into the firmware. Add a Button widget mapped to a virtual pin to trigger valve output, and a Value Display widget to show live soil moisture readings. Upload the updated sketch your phone now mirrors your garden’s status in real time.
- Integrate Home Assistant for deeper automation. Install the MQTT broker add-on (Mosquitto) in Home Assistant, then update your ESP32 sketch to publish sensor readings to MQTT topics. In Home Assistant, create MQTT sensor entities and add your irrigation valves as switch entities. This brings your smart irrigation system into a unified smart home dashboard alongside lights, thermostats, and other devices.
- Set up smartphone scheduling inside Home Assistant’s Automations editor. Define time-based triggers — for example, 6:00 AM every weekday — combined with a condition that checks current soil moisture. If moisture is below your threshold, the automation fires an MQTT command to open the valve for a set duration. In practice, layering time triggers with sensor conditions prevents unnecessary watering even when schedules run.
- Test each integration layer independently before combining them. Verify Wi-Fi stability, confirm Blynk widgets reflect live data, and validate that Home Assistant receives MQTT payloads correctly using the built-in MQTT listener tool.
- Secure your setup by switching from hardcoded credentials to environment variables or a config file excluded from version control, and enable MQTT authentication within the Mosquitto settings.
With connectivity confirmed and scheduling active, your smart irrigation system responds dynamically to both time and soil conditions no manual intervention needed. This single-zone IoT foundation also sets you up perfectly for the next step: expanding the same architecture to independently control multiple garden zones.
Building a Smart Irrigation Control System for Multiple Garden Zones
Once your single-zone build is running smoothly, scaling up to a multi-zone smart irrigation control system is the logical next step especially if your garden includes raised beds, a lawn, and container plants that all have different watering needs. Here’s how to expand your DIY smart irrigation system to handle multiple zones efficiently:
- Map your zones first. Identify distinct plant groupings by water demand vegetables, ornamentals, succulents, and lawn areas each behave differently. Grouping plants with similar needs into dedicated zones prevents overwatering in one area while underwatering another.
- Add a soil moisture sensor per zone. One sensor can’t represent an entire garden. Deploy an individual capacitive sensor in each zone so your microcontroller receives accurate, localized readings rather than a blended average that masks dry spots.
- Wire a solenoid valve for each zone. Connect a dedicated 24V solenoid valve to each zone’s supply line. Run each valve’s signal wire back to a separate output pin on your Arduino or ESP32 so zones operate independently.
- Update your control logic. Modify your sketch to cycle through each sensor-valve pair in sequence. Add a short delay between zone activations to prevent pressure drops if multiple valves are on a shared supply line.
- Label and document every connection. Multi-zone wiring gets complicated fast. A simple wiring diagram even a hand-drawn one saves significant time during troubleshooting later.
- Plan expansion ports now. If your microcontroller’s GPIO pins are filling up, add a relay module or an I/O expander board early on. Retrofitting an overcrowded build is far more work than reserving a few extra channels upfront.
One practical approach is to start with two zones and validate the logic before adding more. Getting the threshold calibration right across multiple zones is where most builders spend extra time which is exactly why the next section covers optimal moisture settings for every major plant type.
Best Moisture Threshold Settings for Different Plants
With your multi-zone smart irrigation control system configured, dialing in the right soil moisture thresholds for each plant type is what separates a good DIY smart irrigation system from a truly water-wise one.
Trigger your zones too early and you waste water, wait too long and plants stress. Use the reference table below to program your smart irrigation control system’s sensor triggers accurately.
| Plant Type | Trigger Watering At | Stop Watering At | Notes |
|---|---|---|---|
| Vegetables | 40–50% VWC | 70–80% VWC | Consistent moisture boosts yield |
| Herbs | 35–45% VWC | 65–70% VWC | Allow slight drying between cycles |
| Succulents | 15–20% VWC | 40–45% VWC | Overwatering is the primary risk |
| Flower Beds | 40–50% VWC | 70–75% VWC | Adjust for bloom season demands |
| Raised Beds | 45–55% VWC | 75–80% VWC | Faster drainage requires higher targets |
| Indoor Plants | 30–40% VWC | 60–65% VWC | Varies significantly by species |
Once these thresholds are programmed, your smart irrigation system responds to actual plant needs rather than a fixed schedule. Beyond sensor settings, a few smart watering habits can stretch your water savings even further which is exactly what the next section covers.
Water-Saving Tips for a Water-Wise Garden
With your moisture thresholds dialed in, layering smart habits on top of your DIY smart irrigation system amplifies every drop of efficiency you’ve built into the hardware.
- Water early in the morning — scheduling your smart irrigation control system to run between 5:00 a.m. and 9:00 a.m. significantly reduces evaporation loss, giving roots time to absorb moisture before midday heat peaks.
- Apply a 2–3-inch layer of mulch around plant beds to retain soil moisture, slow evaporation, and reduce how often your sensors trigger watering cycles.
- Group plants by water need: clustering thirsty plants in one zone and drought-tolerant species in another lets your multi-zone smart irrigation system deliver precisely what each area requires, cutting overall usage.
- Install drip irrigation lines at the root zone wherever possible. Drip emitters deliver water directly to the soil rather than to foliage, reducing runoff and the risk of fungal disease.
- Monitor local weather forecasts via your microcontroller’s API integration or a weather-aware automation rule, so the system adjusts schedules proactively ahead of dry spells.
- Skip watering after rain program a rain-delay rule that holds all zones for 24–48 hours following measurable precipitation, preventing oversaturation and wasted water.
Combining these habits with your calibrated moisture thresholds creates a genuinely water-wise garden. Even small adjustments compound over a growing season. Of course, building and running any smart irrigation system introduces real-world challenges and the next section walks through the most common DIY problems you’re likely to encounter, along with practical fixes.
Common DIY Smart Irrigation Problems and Solutions
Even a well-designed smart irrigation system will occasionally throw a curveball. Knowing how to diagnose and fix the most frequent issues keeps your garden thriving without costly service calls. Here’s how to troubleshoot the most common problems.
- Check sensor readings first. Inaccurate soil moisture data is often the root cause of over- or underwatering. Recalibrate your sensor by testing it in dry soil versus a cup of water and comparing output values against expected ranges. Dirty or corroded sensor probes are a frequent culprit clean them gently with a soft cloth.
- Diagnose pump issues by checking voltage and flow. If your pump runs but delivers weak pressure, inspect the intake filter for debris. No-start conditions usually point to a blown fuse, a loose wire, or a relay that isn’t closing properly.
- Silence a chattering relay by verifying your microcontroller’s output pin delivers a clean, stable signal. Relay chatter typically indicates insufficient coil voltage or a floating input pin add a pull-down resistor to stabilize the input.
- Resolve Wi-Fi connectivity drops by moving your controller closer to your router or adding a Wi-Fi extender. In your firmware, implement a reconnection loop so your smart irrigation control system automatically rejoins the network after a dropout without losing its schedule.
- Fix overwatering or underwatering by revisiting the moisture thresholds covered in the previous section. Cross-reference your sensor’s readings with a manual soil probe to confirm accuracy before adjusting trigger values.
- Inspect for leaks at every threaded fitting and solenoid valve connection. Apply PTFE thread tape on all joints and hand-tighten fittings before giving them a final quarter-turn with pliers.
Addressing these issues systematically keeps your DIY smart irrigation system running reliably season after season and sets you up perfectly for the regular maintenance routine covered next.
Maintenance Tips for Long-Term Reliability
Keeping your DIY smart irrigation system running smoothly season after season comes down to a handful of consistent habits. Follow these steps to protect your investment and maintain peak performance.
- Flush your lines monthly by running each zone manually for two to three minutes to clear sediment and debris before it clogs emitters or drip tubing.
- Inspect connections and fittings every four to six weeks look for cracked joints, loose compression fittings, or slow drips at the valve manifold, which can signal pressure problems.
- Clean filters and emitters by soaking clogged drip heads in warm water, then clearing the mesh screen on any inline filter to restore consistent flow.
- Update controller firmware whenever your smart irrigation control system app prompts you firmware patches often include weather-algorithm improvements that sharpen water-saving accuracy.
- Winterize your system before the first freeze by shutting off the main valve, draining lines completely, and storing battery-powered sensors indoors to extend their lifespan.
- Test sensors and zones each spring to confirm every component survived the off-season before your garden needs reliable irrigation again.
Steady maintenance keeps repair costs low and your smart irrigation system performing at its best which makes understanding the full cost picture even more worthwhile.
DIY Smart Irrigation System Cost Breakdown
Planning your smart irrigation system budget before you buy a single component saves you from costly surprises. The table below provides a realistic estimate for each layer of a typical DIY smart irrigation control system, so you can prioritize spending and identify where you can trim costs without sacrificing reliability.
- Identify your zone count first. Count the distinct watering areas in your garden — each zone typically requires one solenoid valve, so zone count drives the bulk of your parts cost.
- Reference the component cost table below to build a baseline budget for your specific setup.
- Add a 10–15% contingency for fittings, connectors, and unexpected replacements before you finalize your total.
| Component | Estimated Cost (USD) |
|---|---|
| Microcontroller (e.g., ESP8266/ESP32) | $5 – $15 |
| Solenoid valve (per zone) | $8 – $20 each |
| Relay module (per zone) | $2 – $8 |
| Soil moisture sensor (per zone) | $3 – $10 |
| Flow meter | $15 – $40 |
| Drip irrigation tubing kit | $25 – $60 |
| Weatherproof enclosure | $10 – $30 |
| Power supply / transformer | $10 – $25 |
| Miscellaneous fittings & wire | $10 – $20 |
| Total (4-zone system) | $120 – $280 |
A four-zone DIY setup comfortably lands well under $300 a fraction of the cost of professionally installed smart irrigation systems, which can run $500–$1,500 or more. With your costs mapped out and your system humming reliably, you’re in a great position to explore the upgrades that can push your garden’s efficiency even further.
Future Upgrades for an Even Smarter Garden
With your smart irrigation system humming along and your budget mapped out, the natural next question is: where do you go from here? These upgrades push your DIY smart irrigation system toward full garden autonomy.
- Add hyper-local weather automation. Connect your smart irrigation control system to a personal weather station so it adjusts run times based on actual rainfall at your property, not a forecast miles away.
- Install a rain sensor or shut-off device. A dedicated rain sensor automatically shuts off watering during storms, preventing overwatering and protecting your investment.
- Integrate tank-level monitoring. Attach a float sensor or ultrasonic sensor to any rainwater collection tank so the system draws from harvested water before tapping the main supply.
- Power remote zones with solar. A small solar panel and battery pack eliminate the need to run low-voltage wire across large yards, making expansion far more practical.
- Connect voice assistants. Linking your smart irrigation systems to a voice assistant lets you pause or start zones hands-free while you’re in the yard.
- Explore AI-driven watering predictions. Emerging platforms analyze soil data, plant type, and historical usage to automatically recommend optimized schedules.
Each upgrade layers neatly onto what you’ve already built and that modular advantage becomes especially clear when you stack a DIY smart irrigation system against a traditional setup side by side.
DIY Smart Irrigation System vs Traditional Irrigation
Seeing how your DIY smart irrigation system stacks up against a conventional setup makes the value crystal clear. Use this comparison to confirm you’re making the right call before committing to any remaining purchases or future upgrades.
| Feature | Traditional Irrigation | DIY Smart Irrigation System |
|---|---|---|
| Efficiency | Fixed schedules waste water | Sensor-driven watering cuts waste significantly |
| Automation | Manual timer adjustments required | Fully automated based on soil moisture and weather |
| Control | On-site only | Remote Wi-Fi control via smartphone app |
| Water Savings | Minimal — runs regardless of rain | Measurable reduction in water consumption |
| Upfront Cost | Lower initial spend | Moderate investment; components from ~$50–$200 |
| Maintenance | Simple but reactive | Proactive alerts; slightly more tech involvement |
| Expandability | Limited without full reinstall | Modular zones added easily via software |
In practice, traditional systems run blind they water on a clock, not on actual plant need. A smart irrigation control system responds to real-time conditions, protecting both your garden and your water bill.
Still have questions about specific components, difficulty level, or expected savings? The upcoming FAQ section addresses the most common sticking points head-on.
Frequently Asked Questions (FAQ)
How much does a DIY smart irrigation system cost?
A basic single-zone build typically runs between $50 and $150 in parts, depending on the controller, sensors, and solenoid valves you choose. Expanding to multiple zones adds roughly $15–$30 per zone. That upfront spend is usually recovered quickly EPA WaterSense data shows smart controllers can cut outdoor water use by up to 50% compared to conventional timers.
Is this build too difficult for a beginner?
In practice, the skill bar is lower than most people expect. If you can follow a wiring diagram and upload code via a USB cable, you have everything you need. Most builds take a single weekend. Start with one zone to build confidence, then expand.
Which controller, ESP32 or Arduino, is better?
ESP32 is the stronger choice for most builders. It includes built-in Wi-Fi, Bluetooth, handles multiple sensor inputs simultaneously, and costs roughly the same as an Arduino Uno. Arduino is a solid fallback if you already own one and don’t need wireless control from day one.
Which soil moisture sensor should I use?
Capacitive sensors are the go-to option. They resist corrosion far better than resistive sensors, deliver more stable readings over time, and typically cost under $5 each. Place them at root depth, usually 4–6 inches, for the most accurate data.
Can I control the system from my phone over Wi-Fi?
Yes. With an ESP32 running a simple web server sketch, you can monitor soil moisture readings and trigger watering manually from any browser on your home network. Pairing with an MQTT broker or a platform like Home Assistant extends that control globally.
How many zones can this smart irrigation control system handle?
A single ESP32 can realistically manage 4–8 zones by adding a relay module with enough channels. Each zone gets its own solenoid valve and sensor. Beyond 8 zones, consider a second controller or an I²C multiplexer to expand sensor inputs without signal conflicts.
Conclusion
Building a DIY smart irrigation system puts you in control of one of your home’s most wasteful habits overwatering. By combining soil moisture sensors, a reliable controller, and a thoughtful zone layout, you can transform a conventional sprinkler setup into a precision water-wise system that works smarter, not harder.
Follow these steps to move from planning to action:
- Start with one zone pick your most water-hungry garden bed and automate it first.
- Install a soil moisture sensor to eliminate guesswork and prevent overwatering from the start.
- Program a basic schedule using your controller’s app, then refine it over two to three weeks of real-world data.
- Add a rain sensor or weather integration once your baseline schedule feels stable.
- Expand zone by zone, applying the same sensor-plus-schedule formula to each area of your yard.
- Review your water bill after 30 days the savings will motivate every future upgrade.
A smart irrigation control system doesn’t require a big budget or advanced technical skills. Starting small keeps the project manageable and lets you build confidence before scaling up. Your garden and your water bill will thank you.

Welcome to Homeblesh! I'm a professional content writer with over five years of experience creating well-researched, practical, and reader-focused content for clients on Upwork and Fiverr. Now, I've dedicated my expertise to building Homeblesh, where I share helpful guides, honest recommendations, and actionable tips based on careful research and industry knowledge. My goal is to provide accurate, trustworthy information to help you make informed decisions while delivering clear, useful, and easy-to-understand content.
- Muhammad Imran

- Muhammad Imran

- Muhammad Imran

- Muhammad Imran